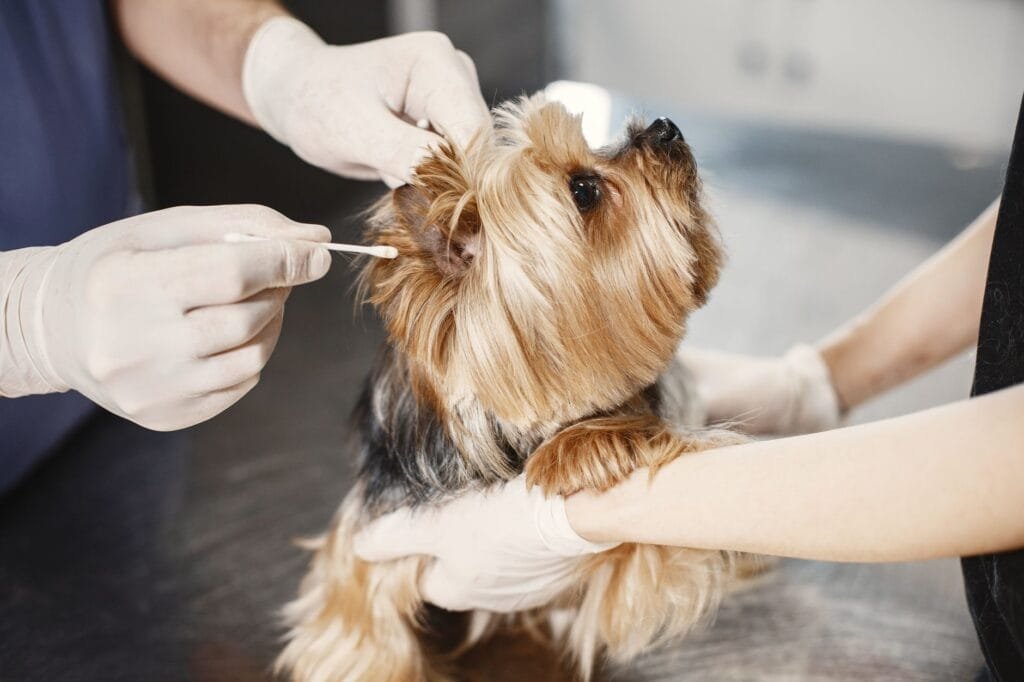
Knowing how to clean dog ears safely at home is one of those small skills that makes a real difference to your dog’s long-term health. It takes about five minutes, needs just a few inexpensive supplies, and can prevent a lot of discomfort down the road.
Why Regular Ear Cleaning Matters for Your Dog
A dog’s ear canal is shaped like an L, which means dirt, wax, moisture, and debris can get trapped easily. Unlike human ears, dogs can’t exactly tip their heads sideways to drain them out. Over time, buildup creates the warm, damp conditions that bacteria and yeast love.
Regular cleaning keeps that buildup in check. It also gives you a chance to spot anything unusual early, before a minor issue becomes a vet visit. Think of it as part of your dog’s normal grooming routine, just like brushing their coat or trimming their nails.
How Often Should You Clean Your Dog’s Ears?
Most dogs do well with ear cleaning once a month. Dogs who swim regularly, have floppy ears, or produce more wax than average may need it every two to three weeks. Dogs with upright, open ears and no history of ear problems might only need cleaning every six to eight weeks.
The honest answer is: let your dog’s ears tell you. If you peek inside and things look clean and smell neutral, you’re fine to wait. If there’s visible dark wax or a faint odour, it’s time to clean. Setting a reminder to check once a week takes about 30 seconds and gives you a good baseline.
What You’ll Need Before You Start (Supplies Checklist)
Getting everything together before you bring your dog over makes the whole process smoother. Here’s what you need:
- Veterinarian-approved ear cleaning solution (look for ones specifically labelled for dogs)
- Cotton balls or gauze pads (not cotton swabs)
- A towel (ear cleaning can get a little messy when your dog shakes their head)
- Dog treats (non-negotiable for keeping things positive)
- Good lighting (a torch or sitting near a window helps)
Avoid using homemade solutions like diluted vinegar or hydrogen peroxide unless your vet has specifically recommended them for your dog. Commercial ear cleaners are formulated to dry properly and maintain the right pH. Using the wrong product can irritate the ear canal rather than help it.
Step-by-Step: How to Clean Dog Ears Safely at Home
This is easier than it sounds, especially after the first time. Go slowly, stay calm, and reward generously throughout.
Step 1: Get Your Dog Comfortable
Sit on the floor with your dog beside you or between your knees. Smaller dogs can sit in your lap. Give a treat before you even touch their ears so they associate the setup with something good.
Step 2: Inspect the Ear First
Gently fold the ear flap back and look inside. Healthy ears look light pink, have minimal wax, and smell neutral or slightly waxy. Dark brown or black discharge, a strong smell, redness, or swelling are all reasons to stop and contact your vet before cleaning.
Step 3: Apply the Ear Cleaning Solution
Hold the ear flap up and gently place the tip of the bottle at the opening of the ear canal. Squeeze in enough solution to fill the canal, following the product’s instructions. You’ll usually hear a faint squelching sound, which is completely normal.
Step 4: Massage the Base of the Ear
With the flap still held back, gently massage the base of the ear (the soft tissue just below the ear opening) for about 20 to 30 seconds. This works the solution down into the canal and loosens debris. Most dogs actually enjoy this part once they’re used to it.
Step 5: Let Your Dog Shake
Release their head and let them shake. This is where the towel earns its place. Shaking brings debris up from the canal, which is exactly what you want.
Step 6: Wipe the Ear Clean
Use a cotton ball or gauze pad to gently wipe out the visible part of the ear canal and the inner ear flap. Work with what you can see. Never insert anything further than your first knuckle. Repeat with a fresh cotton ball until it comes out mostly clean.
Step 7: Reward and Repeat on the Other Side
Big treat, lots of praise, then move to the other ear. Ending on a positive note every single time builds trust for the next session. You’ve got this.
Breed-Specific Considerations (Bulldogs, Boston Terriers, Floppy-Eared Dogs)
Not all ears are the same, and knowing how to clean dog ears safely at home means accounting for your specific breed’s anatomy.
English and French Bulldogs
English Bulldogs have a rose-shaped ear that partially folds over, which reduces airflow and traps moisture. French Bulldogs have upright bat ears that are more open to air, which actually helps keep them cleaner than many other breeds. That said, they can still accumulate wax and debris, so regular checks are still worthwhile. For a full walkthrough on cleaning French Bulldog ears specificallyincluding the quirks of their ear shape, that guide goes into more depth. And if your Frenchie is still a puppy, it helps to understand how French Bulldog ears develop before their adult shape is established.
Boston Terriers
Boston Terriers have upright, open ears similar to French Bulldogs, which is generally a good thing for ear health. They tend to produce less wax than floppy-eared breeds. Their ears are small, so use a small cotton ball and work gently. If you have a young Boston Terrier puppy, understanding Boston Terrier ear development can help you track what’s normal as they grow.
Floppy-Eared Dogs
Breeds like Cocker Spaniels, Basset Hounds, and Golden Retrievers have long, heavy ear flaps that rest flat against the head. This creates a warm, humid environment inside the canal and means these dogs genuinely need more frequent cleaning. Every two to three weeks is often appropriate. After swimming, dry the outer ear thoroughly with a towel right away.
What to Avoid When Cleaning Dog Ears
A few things that seem helpful can actually cause harm:
- Cotton swabs (Q-tips): These push debris further into the canal rather than removing it, and risk damaging the eardrum if your dog moves suddenly.
- Cleaning too often: Over-cleaning strips the ear of its natural protective barrier and can cause irritation on its own.
- Probing too deep: Only clean what you can see. The inner canal is not your territory without veterinary training.
- Using cold solution: Warm the bottle in your hands for a minute before use. Cold liquid in the ear is uncomfortable and makes dogs more resistant.
- Cleaning an infected ear: If the ear looks inflamed or smells strongly, stop. Cleaning an infected ear can spread bacteria and cause more damage.
Signs of Infection or a Problem: When to See a Vet
Regular ear cleaning at home is a great habit, and it also puts you in a position to notice when something is off. Learning how to clean dog ears safely at home includes knowing when to hand things over to a professional.
Contact your vet if you notice any of the following:
- Dark brown or black discharge that isn’t clearing up
- A strong, yeasty, or sour smell coming from the ear
- Redness, swelling, or visible irritation inside the ear
- Your dog scratching at their ear persistently or shaking their head frequently
- Any discharge that looks like it could be pus
- Your dog wincing or pulling away when the ear is gently touched
None of this is a failure on your part. Ear infections are common in dogs, especially in certain breeds, and a vet catching one early is the best possible outcome. Checking in with a professional is just responsible ownership, full stop.
For a reliable overview of ear anatomy and health, the National Institutes of Health publishes peer-reviewed veterinary resources that vets themselves reference. Your own vet is always your best first call for breed-specific guidance.
Tips to Make Ear Cleaning Stress-Free for Your Dog
The first time is always the hardest. After that, most dogs settle into it quickly if you make the experience consistently positive.
Start young if you can. Puppies who are introduced to ear handling early are far more relaxed about it as adults. If you have an older dog who’s never had their ears touched, begin with just lifting the ear flap and giving a treat, nothing more. Do that for a few days before introducing the solution.
Keep sessions short. Even if you only manage one ear before your dog has had enough, stop on a positive note and try the other ear later. A calm, incomplete session is better than a stressful complete one.
Use high-value treats during ear cleaning, something your dog doesn’t get any other time. The ear cleaning routine then becomes something your dog actually looks forward to, or at least tolerates happily.
FAQ
What is the safest solution to use for cleaning dog ears at home?
A commercial ear cleaning solution labelled specifically for dogs is the safest choice. These are formulated to maintain the correct pH, break up wax, and evaporate properly so they don’t leave moisture behind. Ask your vet to recommend a brand if you’re unsure where to start.
How do I know if my dog’s ears are infected rather than just dirty?
Dirty ears typically have a small amount of brown or tan wax and a mild smell. Infected ears often have a strong odour (yeasty, sour, or foul), dark or unusual discharge, visible redness or swelling, and your dog may scratch at them or shake their head frequently. If you’re unsure, call your vet rather than attempting to clean.
Can I use cotton swabs or Q-tips to clean my dog’s ears?
No. Cotton swabs should never be used inside a dog’s ear canal. They push debris deeper rather than removing it, and any sudden movement from your dog risks damaging the eardrum. Stick to cotton balls or gauze pads, and only clean what you can see.
How often should I clean my dog’s ears?
Most dogs need ear cleaning roughly once a month. Dogs who swim often, have floppy ears, or are prone to wax buildup may need it every two to three weeks. Breeds with upright, open ears (like French Bulldogs and Boston Terriers) may need it less often. Check weekly and clean when you see visible buildup.
What if my dog won’t let me touch their ears?
Start with gradual desensitisation. Just touch the ear briefly, give a treat, and stop. Repeat daily for a week before moving to lifting the ear flap. Build up slowly over several sessions. If your dog is showing signs of pain when their ears are touched (rather than just mild reluctance), have a vet check them before you attempt cleaning, as there may already be an underlying issue.