Dog nail trimming at home tips for anxious dogs always start in the same place: with patience, not clippers. If your dog trembles, snaps, or turns into a four-legged escape artist the moment you reach for their paws, you are not alone and you have not failed them.
Why Nail Trimming Stresses Dogs Out (and Why It Matters Anyway)
Paws are sensitive. Dogs use them constantly, and many instinctively guard them. Add in the sound of clippers, the pressure of restraint, and possibly one bad experience where the quick was nicked, and you have a recipe for a dog that associates nail time with genuine dread.
That dread is especially common in bulldogs, Boston Terriers, and other brachycephalic breeds. These dogs tend to run warmer emotionally. They pick up on tension fast and can escalate from uneasy to panicked in seconds.
So why bother trimming at all? Overgrown nails curl into the paw pad, alter your dog’s gait, and put serious strain on joints over time. According to the National Institutes of Health, chronic posture changes from untrimmed nails can contribute to musculoskeletal issues in dogs. Short nails are not a cosmetic preference. They are a health requirement.
Tools You’ll Need Before You Start
Getting the right equipment removes one big variable from an already stressful process. You do not need a grooming table or professional kit. You do need the right basics.
- Guillotine or scissor-style clippers: Guillotine clippers work well for smaller breeds. Scissor-style pliers clippers give you more control for thicker bulldog nails.
- Styptic powder: Keeps this within reach always. If you nick the quick, it stops bleeding fast. Cornstarch works in a pinch.
- High-value treats: Think small, soft, and irresistible. Freeze-dried meat, tiny cheese cubes, or liver treats. Save these exclusively for nail sessions so they stay special.
- A non-slip mat: Slipping on a hard floor adds panic. A yoga mat or rubber-backed bath mat helps your dog feel stable and secure.
- Good lighting: Natural light or a bright lamp helps you see the quick, especially on darker nails.
A nail grinder is worth considering for very anxious dogs. The gradual filing action is less abrupt than a snap of the clipper, and some dogs tolerate the vibration better than the cutting pressure. Try both and let your dog tell you which they prefer.
Desensitization: The Step Before Any Trimming Happens
This is the section most guides skip, and it is the reason most anxious dogs stay anxious. Dog nail trimming at home tips only work if your dog can tolerate the situation. Desensitization builds that tolerance gradually over days or weeks, not in one ambitious Saturday session.
Start with paw handling. Do this away from the clippers entirely. Pick a calm moment, not before dinner, not during zoomies. Gently hold your dog’s paw for two seconds, then release and treat. Do this five or six times per session, once or twice a day.
When your dog stays relaxed for paw holds, add light pressure on individual toes. Then introduce the clipper as an object, letting your dog sniff it while you treat. Click it near them without touching them. Touch the closed clipper to a paw without cutting. Treat every step.
This process can take anywhere from three days to three weeks depending on your dog’s history. That is completely normal. Most dogs with genuine paw anxiety need at least a week of daily handling before they are ready for an actual trim. Rushing this stage costs you far more time in the long run.
Step-by-Step: How to Trim Your Anxious Dog’s Nails at Home
Once your dog accepts paw handling without bracing or pulling away, you are ready. Keep sessions short. One paw per session is a legitimate goal, especially at first.
- Set the scene. Mat down, treats ready, good light. Stay calm yourself. Dogs read your energy accurately.
- Settle your dog. Sit on the floor with them. Let them lean against you if that helps. Avoid pinning or forceful restraint.
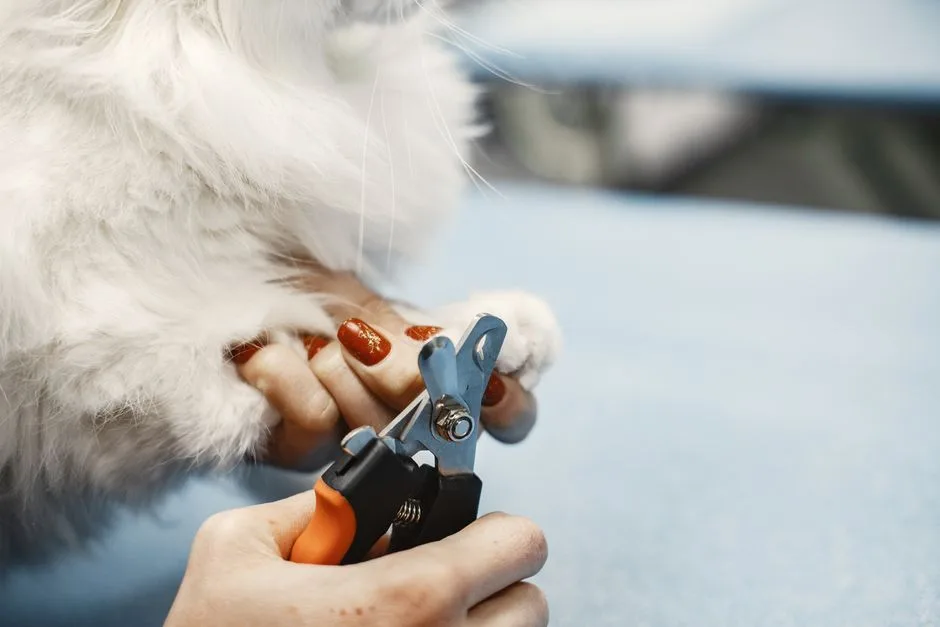
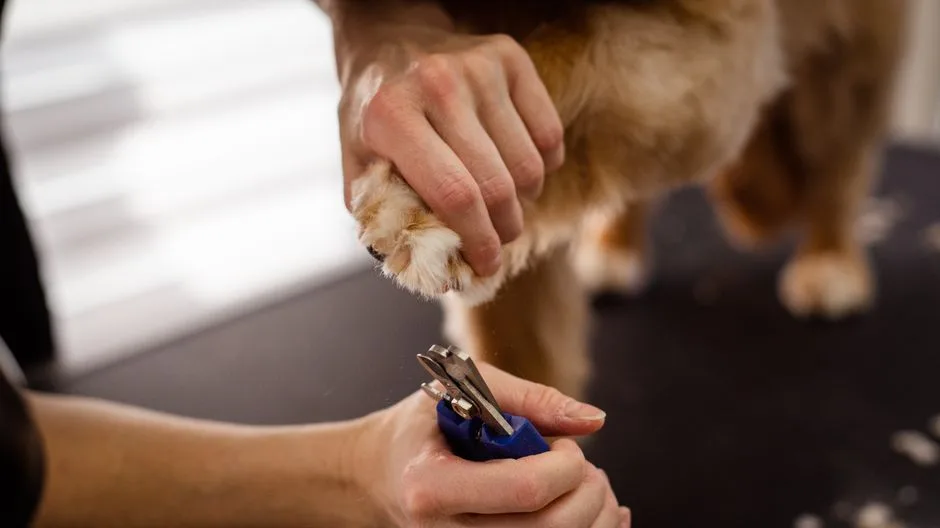
- Hold the paw gently but firmly. Support the whole foot, not just one toe. Keep your grip steady, not tight.
- Identify the quick. On white nails, you can see a pink shadow inside the nail. Stop before you reach it. On black nails, trim tiny slivers and look at the cut surface. When a grey or black dot appears in the center, stop. You are close to the quick.
- Make the cut. One smooth, confident squeeze. Hesitating causes crushing pressure which hurts more. Aim for a 45-degree angle.
- Treat immediately. Before they even register what happened.
- Read the room. If your dog is still loose and calm, try another nail. If they are tense, stop. End on success, not struggle.
If you only get two nails done in a session, that is two more than yesterday. Celebrate that.
What to Do If You Cut the Quick
It happens to everyone, including experienced groomers. The nail bleeds, your dog yelps, and you both feel terrible. Stay calm. Your reaction matters more than you think right now.
Press styptic powder directly onto the nail tip and hold gentle pressure for thirty seconds. Most bleeding stops within a minute or two. Keep your dog still and distracted with a treat. Do not chase them around the house or make a fuss, both of you will spiral.
Once the bleeding stops, your dog is physically fine. The quick heals quickly. What you need to protect now is trust. End the session immediately, offer a high-value treat, and do some gentle, happy paw handling over the next few days before you try again. Do not let this become the incident that sets your progress back months.
Tips Specific to Bulldogs and Brachycephalic Breeds
Bulldog nails are often thicker and harder than average, which means you need sharper, heavier-duty clippers. A cheap pair will crush rather than cut, which is painful even without hitting the quick.
More importantly, brachycephalic dogs overheat and stress out faster than most breeds. Keep sessions under five minutes. If your English or French Bulldog starts panting heavily, drooling more than usual, or becomes rigid and stiff, stop. Stress in these breeds can escalate to a respiratory event, so it is not worth pushing through.
Try trimming after a walk when your dog is physically tired but not overheated. Many bulldog owners find the grooming sweet spot is about twenty minutes post-exercise: relaxed muscles, lower reactivity, and a dog who just wants to flop somewhere comfortable. You can be that comfortable place while you work.
Good grooming habits connect. While you’re building a routine around nail care, learning about cleaning your dog’s ears safely at home is a natural next step, especially for bulldogs whose ear canals need regular attention.
How Often Should You Trim Your Dog’s Nails?
Most dogs need their nails trimmed every three to four weeks. For anxious dogs, that frequency still holds. Letting nails grow longer to avoid trimming actually makes each session harder because longer nails mean a longer quick, giving you less margin for error.
You can train your ear to know when it’s time. If you hear clicking on hard floors, the nails are overdue. If the nails visibly curve downward or touch the floor when your dog stands straight, they are too long.
For dogs who are particularly resistant, weekly micro-sessions can help. Trim just one or two nails at a time, several times a week. More frequent handling keeps your dog acclimatized and keeps the quick receding gradually, which makes trimming safer and easier over time.
When to Hire a Professional Groomer Instead
Dog nail trimming at home tips are genuinely useful for most owners, but there are situations where a professional is the smarter call. If your dog has bitten during previous attempts, if they go into full panic (shaking, snapping, trying to flee aggressively), or if you have a health condition that makes safe restraint difficult, please do not push through alone.
A fear-free certified groomer, or a veterinary clinic that offers nail trims, can often accomplish in ten minutes what months of home attempts have not. That is not a failure. It is good judgment.
You can also split the work: let a groomer handle it monthly while you continue desensitization at home so that over time, home trimming becomes possible. Progress does not have to be all-or-nothing.
The fundamentals of dog grooming cover a range of skills, and knowing which ones to delegate is part of being a responsible owner.
FAQ
How do I trim my dog’s nails when they won’t let me touch their paws?
Start with desensitization long before clippers enter the picture. Spend several days handling your dog’s paws gently for a few seconds at a time, always followed by a high-value treat. Build up to toe pressure and clipper exposure before attempting any actual trim. Most dogs who resist paw touching need one to three weeks of consistent, calm handling before they are ready.
What do I do if I cut the quick and my dog’s nail bleeds?
Apply styptic powder directly to the tip of the nail and hold light pressure for thirty seconds. Bleeding usually stops within one to two minutes. Keep your dog calm, offer a treat, and end the session on a positive note. The quick heals on its own. Your priority after that is rebuilding trust through gentle paw handling over the following days before you try again.
How often should an anxious dog’s nails be trimmed at home?
Every three to four weeks is the standard recommendation, even for anxious dogs. Letting nails grow too long to avoid trimming makes the quick grow longer too, reducing your safe cutting margin. For very resistant dogs, consider trimming one or two nails every few days rather than all nails in a single session. Frequent, short exposures reduce anxiety over time and keep nails at a manageable length.